Welcome New Students!
Below you will find step-by-step instructions on how to create a password for your University of New Haven account, set up Microsoft Authenticator (required), and download Outlook to your mobile device. Video instructions are also included for your convenience. After completing these steps, please click here to go to our technical support homepage for any additional technical help questions.
Important Information: Before we begin
A Quick Briefing on Account Security
Welcome to the university. As you begin using your student credentials to access email, grades, and campus resources, we want to ensure your transition is as secure as possible.
You may occasionally encounter "phishing" attempts. These are normally emails designed to look official that are actually trying to compromise your account. To keep your information safe, we ask that you take a moment to review the security standards below.
Not only will these tips assist with your journey at the University of New Haven, but they will also assist in everyday life.
Step 1: Identify the Red Flags
Trust No One (Even Students): Phishing often looks official, but sometimes attackers use a compromised student account to trick you.
The Golden Rule: The University will NEVER ask for your password or personal details via email. If they ask, it’s a scam.
Quick Red Flags (Report these emails to phish@newhaven.edu):
- Panic Mode: Any email claiming your "account will be deleted" or "aid is at risk."
- The "From" Field: If the name says "OIT" but the email is @gmail.com or @yahoo.com.
- Messy Writing: Awkward phrasing, weird typos, or missing official signatures.
- Random Files: Attachments or links you weren't expecting.
- Too Good To Be True: Beware of fake job offers. No one will pay you $400 a week to walk their dog.
Step 2: Check Before You Click
The Hover Test: Before you click, hover your mouse over any link. If the destination doesn't end in newhaven.edu, stay away.
Go to the Source: If an email says there is a problem with your account, don't use the link in the message. Instead, close the email and log in directly through the myCharger portal. If you are able to log into mycharger, simply report the message(s) to phish@newhaven.edu and delete the email.
Step 3: Report and Delete
If you suspect an email is a phishing attempt:
- Report it: Forward the suspicious message to phish@newhaven.edu. This helps our security team protect the rest of the campus.
- Delete it: Once reported, delete the message from your inbox.
Step 4: When in doubt, we're here to help!
If you aren't sure if an email is real, or if you think you may have accidentally clicked a suspicious link, come see us immediately.
Got a Suspicious Email? Forward the email to phish@newhaven.edu. We will verify the email for you.
Already Interacted? If you entered your password or approved an Authenticator request from a suspicious email:
Email: StudentTechSupport@newhaven.edu
Visit Us: Maxcy Hall, Room 109
Your Role: While our security systems scan links and attachments, your vigilance is our strongest line of defense.
Getting Started - What you will need
Here is what you will need to set up your account:
Computer
To set up your account properly, please follow all of the steps on a computer, NOT your phone. Using only a phone will cause setup issues with Microsoft Authenticator setup.
Cell Phone
Your phone is required for only one step. On your computer screen, when prompted, you will activate Microsoft Authenticator.
~5 Minutes
Setting up your account usually only takes about 5 minutes! Please carefully read the below instructions below to set up your account.
Step 1: Setup Password
Please follow these step-by-step instructions
- Receive email entitled “Student Account Notification” from Student Tech Support with your new student ID and email address.

- Please visit https://passwordreset.microsoftonline.com/ to create your password for the first time. You must complete this step.
- Enter your new email address and the captcha in the image.

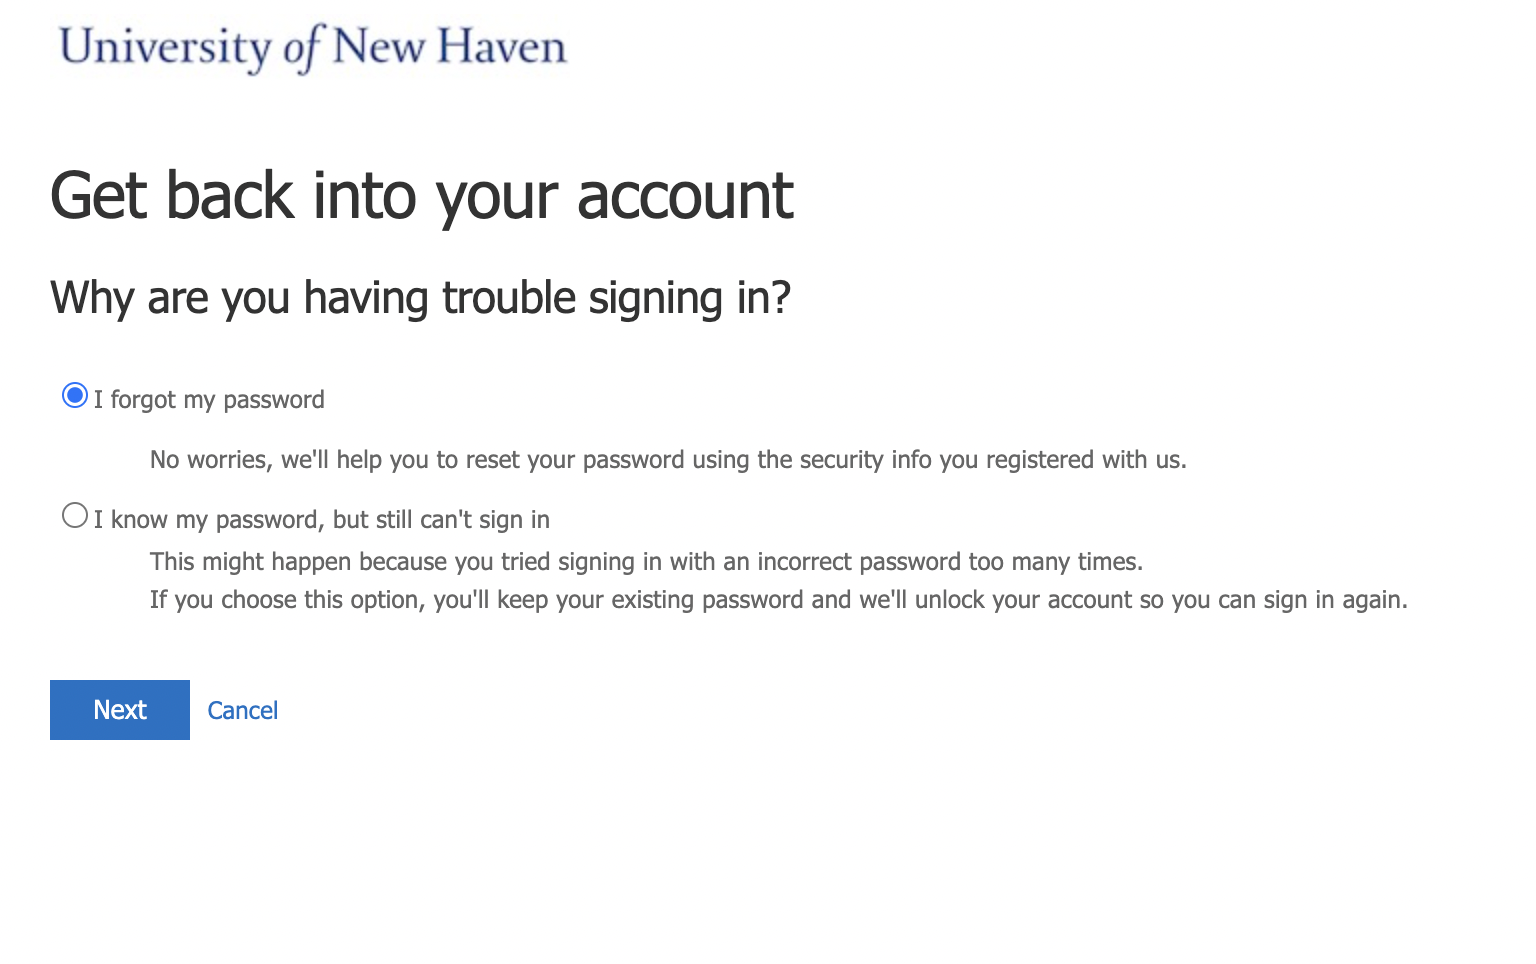
- Click “I forgot my password”
- Click “Email” to have a verification code sent to the same email address your student account notification email went.

- Receive and enter Verification Code

- Set your new password.

- Your new password has been set. You will receive a confirmation email to both your personal email account and your new student email account.

Step 2: Microsoft Authenticator (MFA)
Follow the video instructions below. If you need additional help, a step-by-step written guide is also available beneath the video.
Step 2. Add Microsoft Authenticator to your University of New Haven account
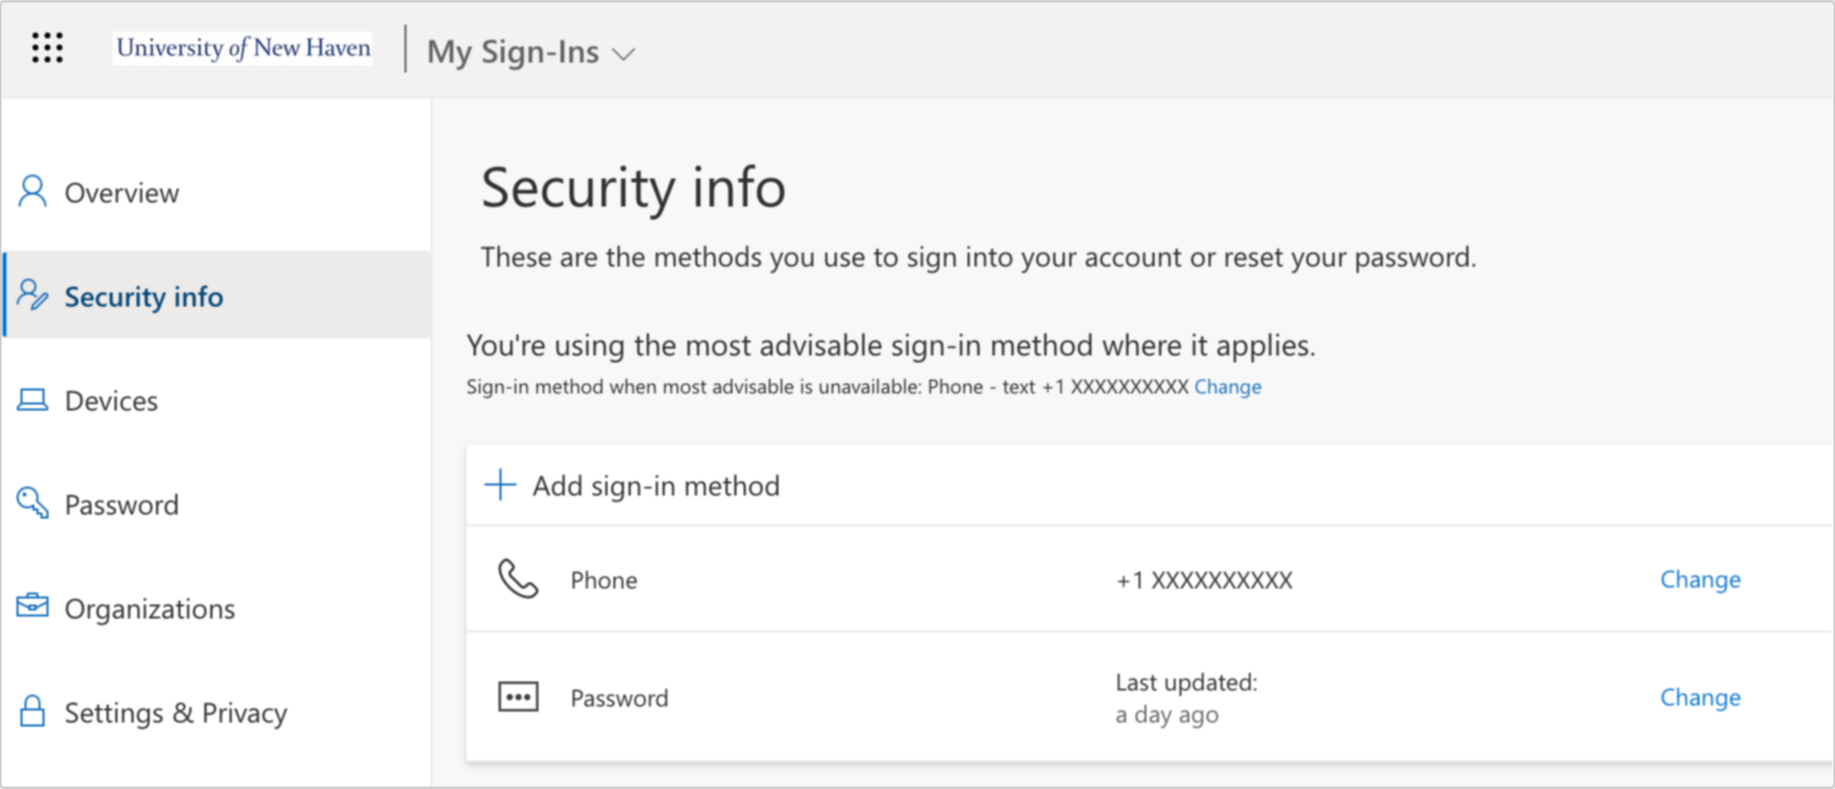
- On your computer, visit the My Security portal or go to https://mysignins.microsoft.com/security-info.
- If prompted, login with your University of New Haven email address and password.
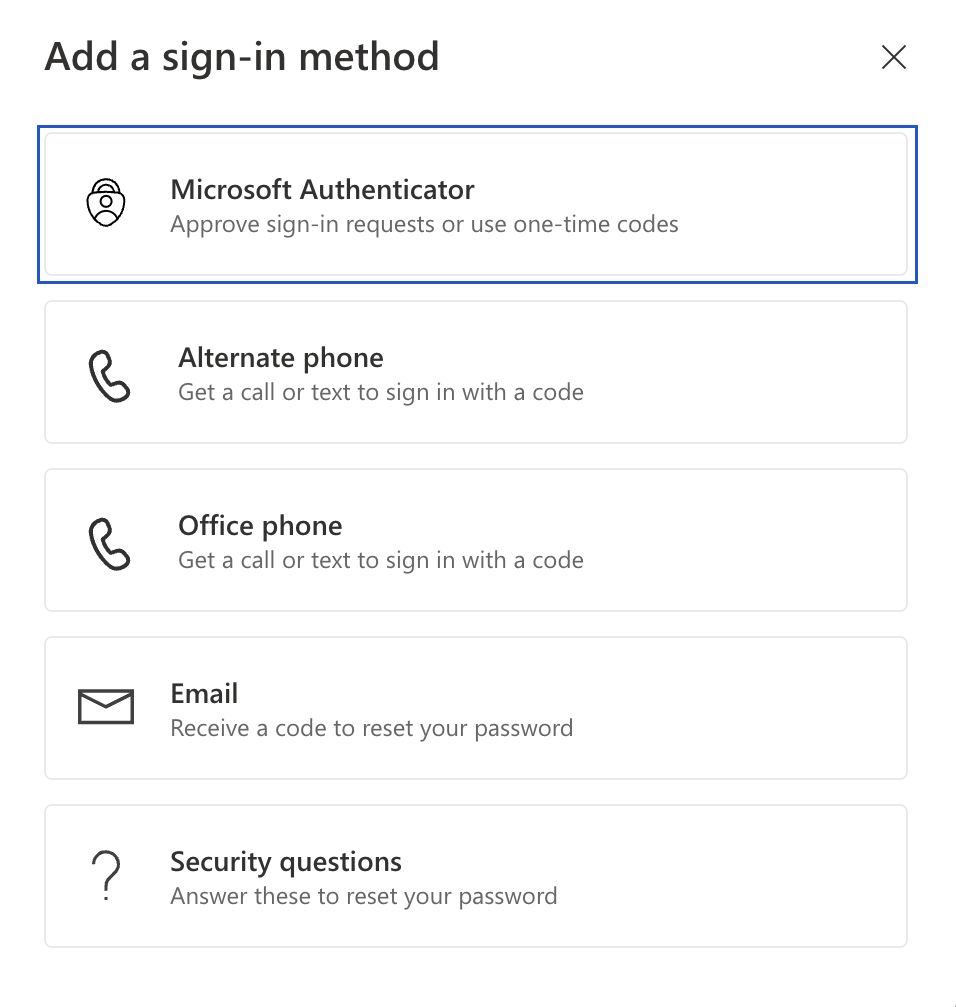
- Select Add sign-in method
- Select Microsoft Authenticator from the list
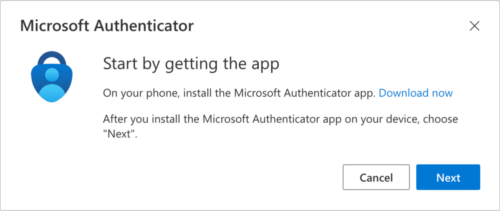
- On the Start by getting the app window, select Next.
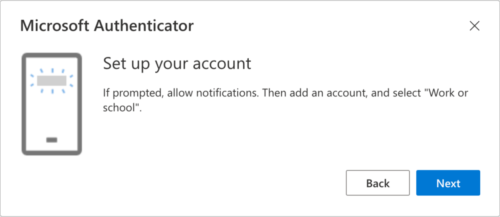
- On the Set up your account window, select Next.
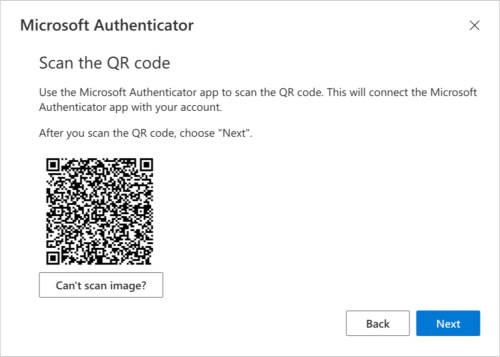
- The Scan the QR code page appears. Remain on this page on your desktop while you set up the Microsoft Authenticator app on your mobile device. Do not scan this QR code until step 12. Note: The QR Code presented on your computer can only be scanned by the Microsoft Authenticator application.
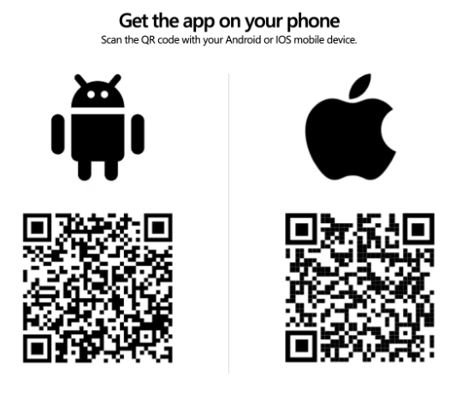
- Open the Microsoft Authenticator app on your iOS or Android device, select to allow notifications (if prompted).
- Tap on the + icon on the upper-right corner.

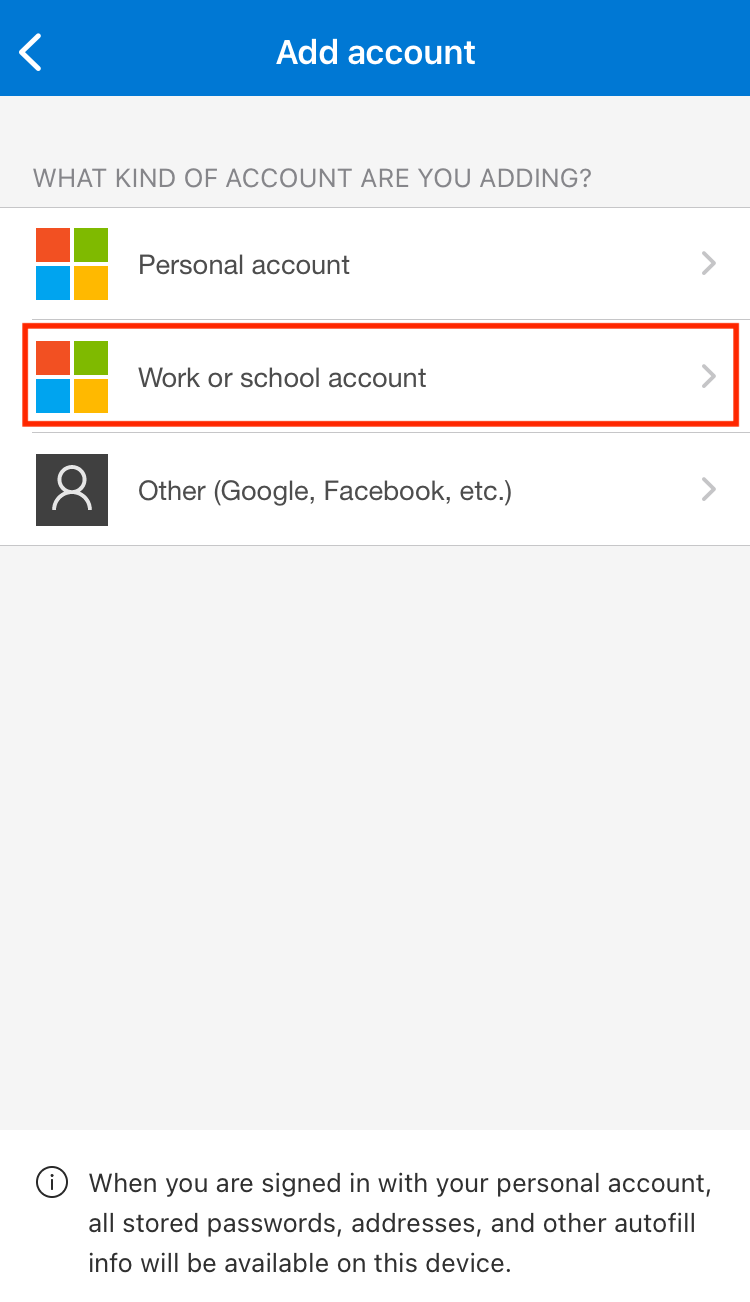
- A new screen will appear to add an account to the application. Tap on Work or school account.
- On your device, select the Scan QR code option.
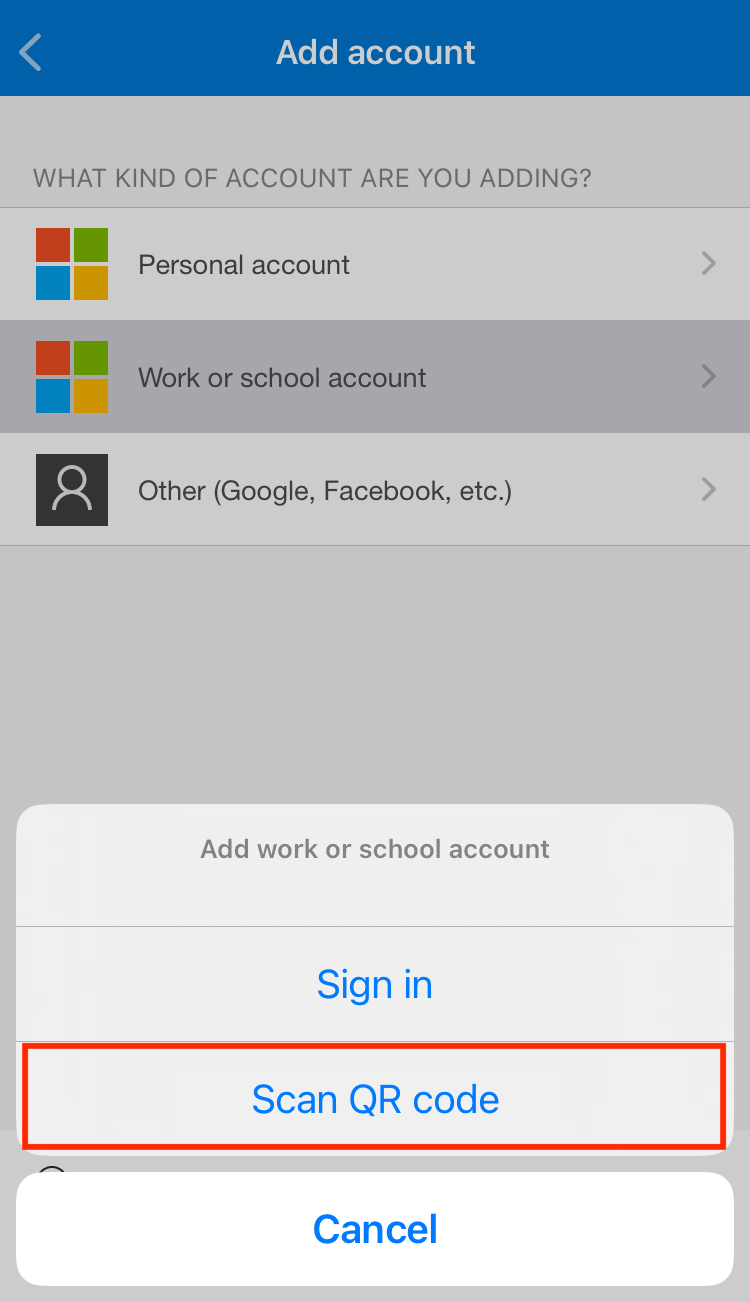
Note: The first time you set up the Microsoft Authenticator app, you might receive a prompt asking whether to allow the app to access your camera (iOS) or to allow the app to take pictures and record video (Android). You must select Allow so the authenticator app can access your camera to take a picture of the QR code in the next step. If you don’t allow the camera, you can still set up the authenticator app, but you’ll need to add the code information manually. - Scan the provided code on your computer with the Microsoft Authenticator app.
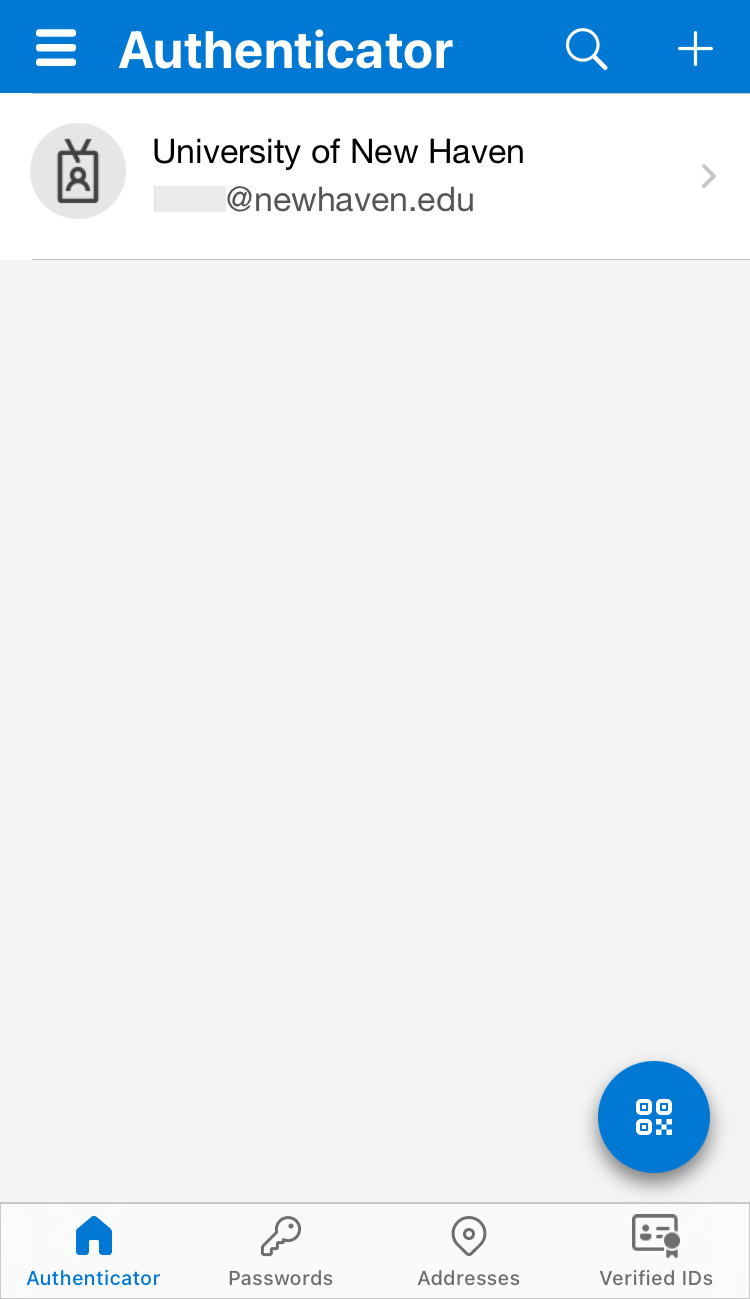
- When you see your University of New Haven account listed, please go back to your computer for further setup. Keep your device nearby as it will be needed shortly.
- Select Next on the Scan the QR code page on your computer.
- Once you click Next, a number will appear on your screen and a push notification will be sent to your device to test your account.
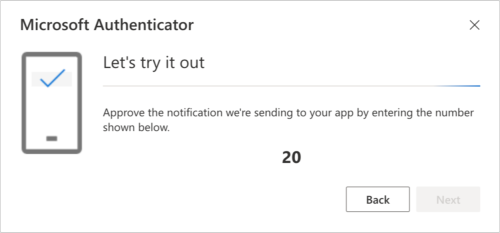
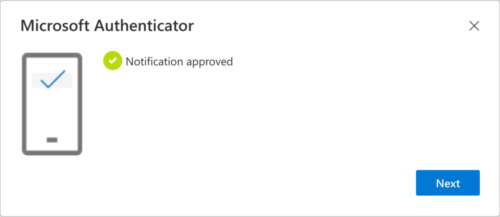
- Type the number shown on your computer into the Microsoft Authenticator application on your device and tap Yes.
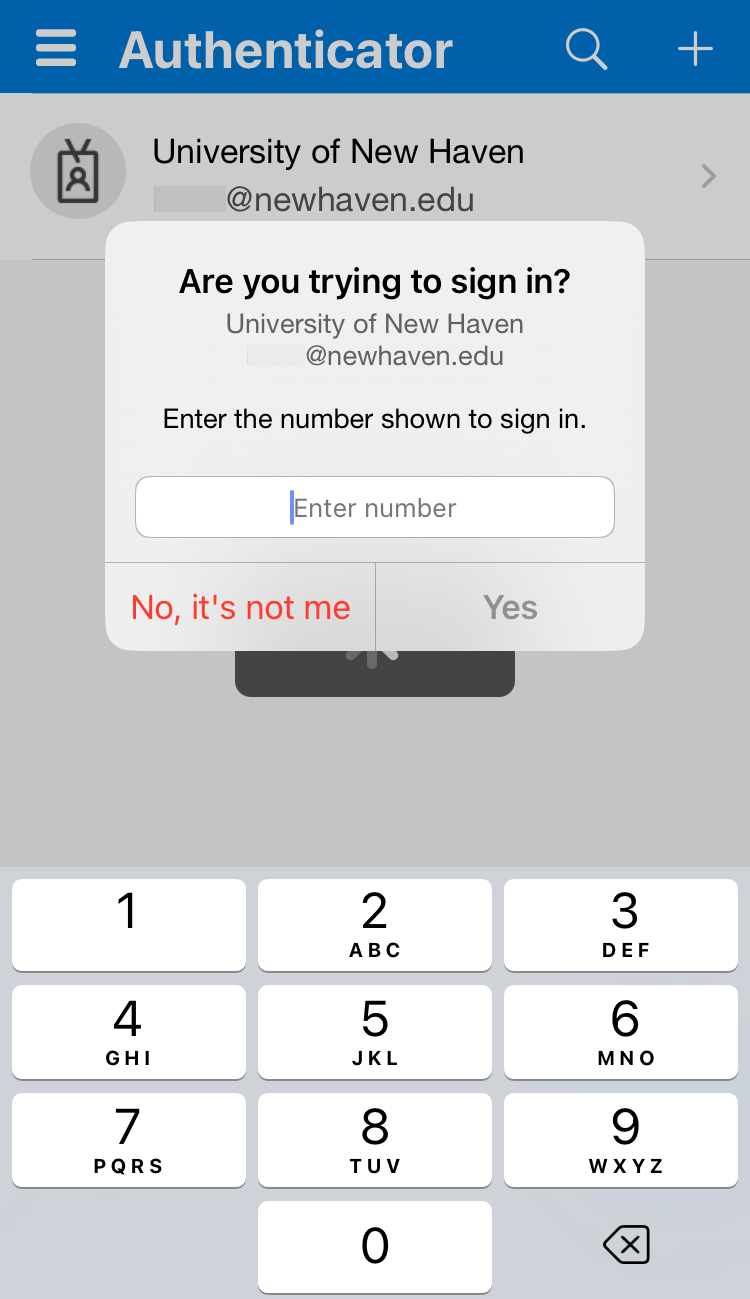
- After you enter the number and tap Yes, the notification has been approved. On your computer click Next.
Congratulations! You are now setup with the Microsoft Authenticator app and can receive push notifications for multi-factor authentication verification and for password reset.