Welcome New Students

Below you will find step-by-step instructions on how to create a password for your University of New Haven account, set up Microsoft Authenticator (required), and download Outlook to your mobile device. Video instructions are also included for your convenience. After completing these steps, please click here to go to our technical support page for any additional technical help questions.

Get Started - What you will need

Here is what you will need to set up your account:

Computer

To set up your account properly, please follow all of the steps on a computer, NOT your phone. Using only a phone will cause setup issues with Microsoft Authenticator setup.

Cell Phone

Your phone is required for only one step. On your computer screen, when prompted, you will activate Microsoft Authenticator.

~ 5 Minutes

Setting up your account usually only takes about 5 minutes! Please carefully read the below instructions below to set up your account.

Step 1: Setup Password

Step one: Setting up your password (required)

Please follow these step-by-step instructions

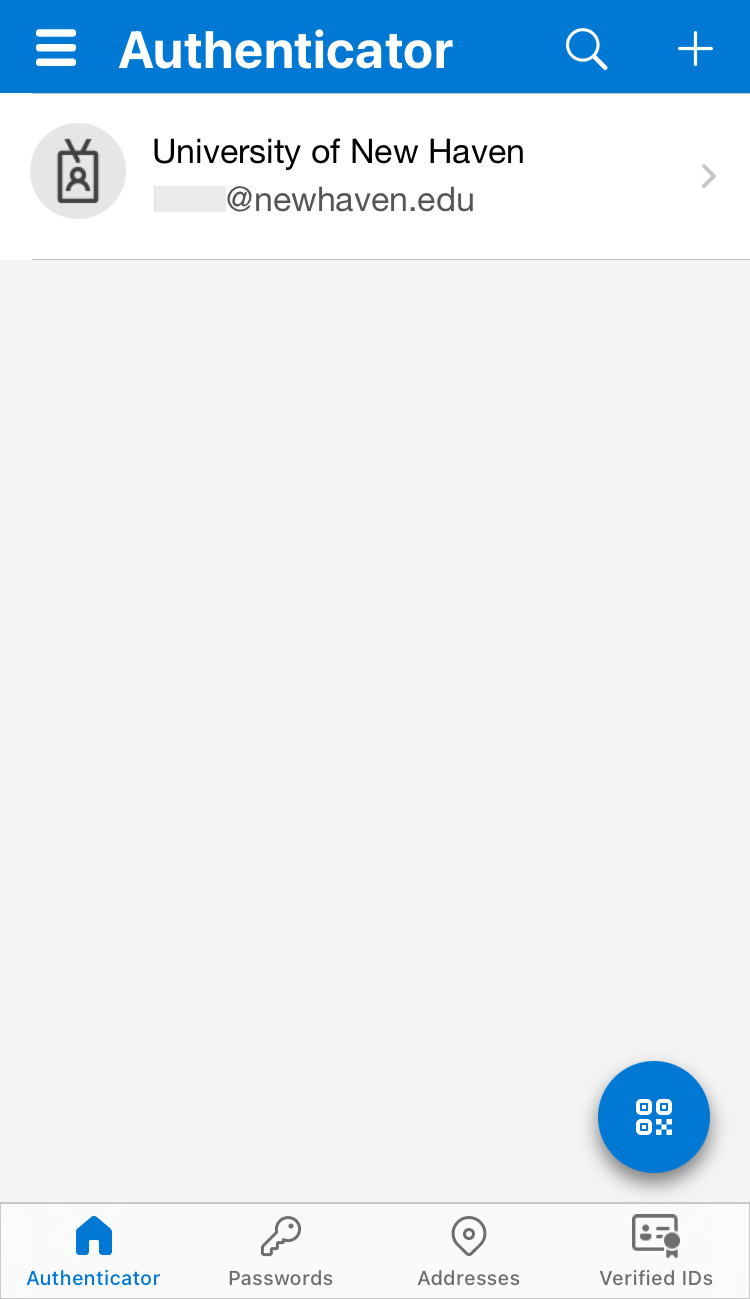
  1. Receive email entitled “Student Account Notification” from Student Tech Support with your new student ID and email address.
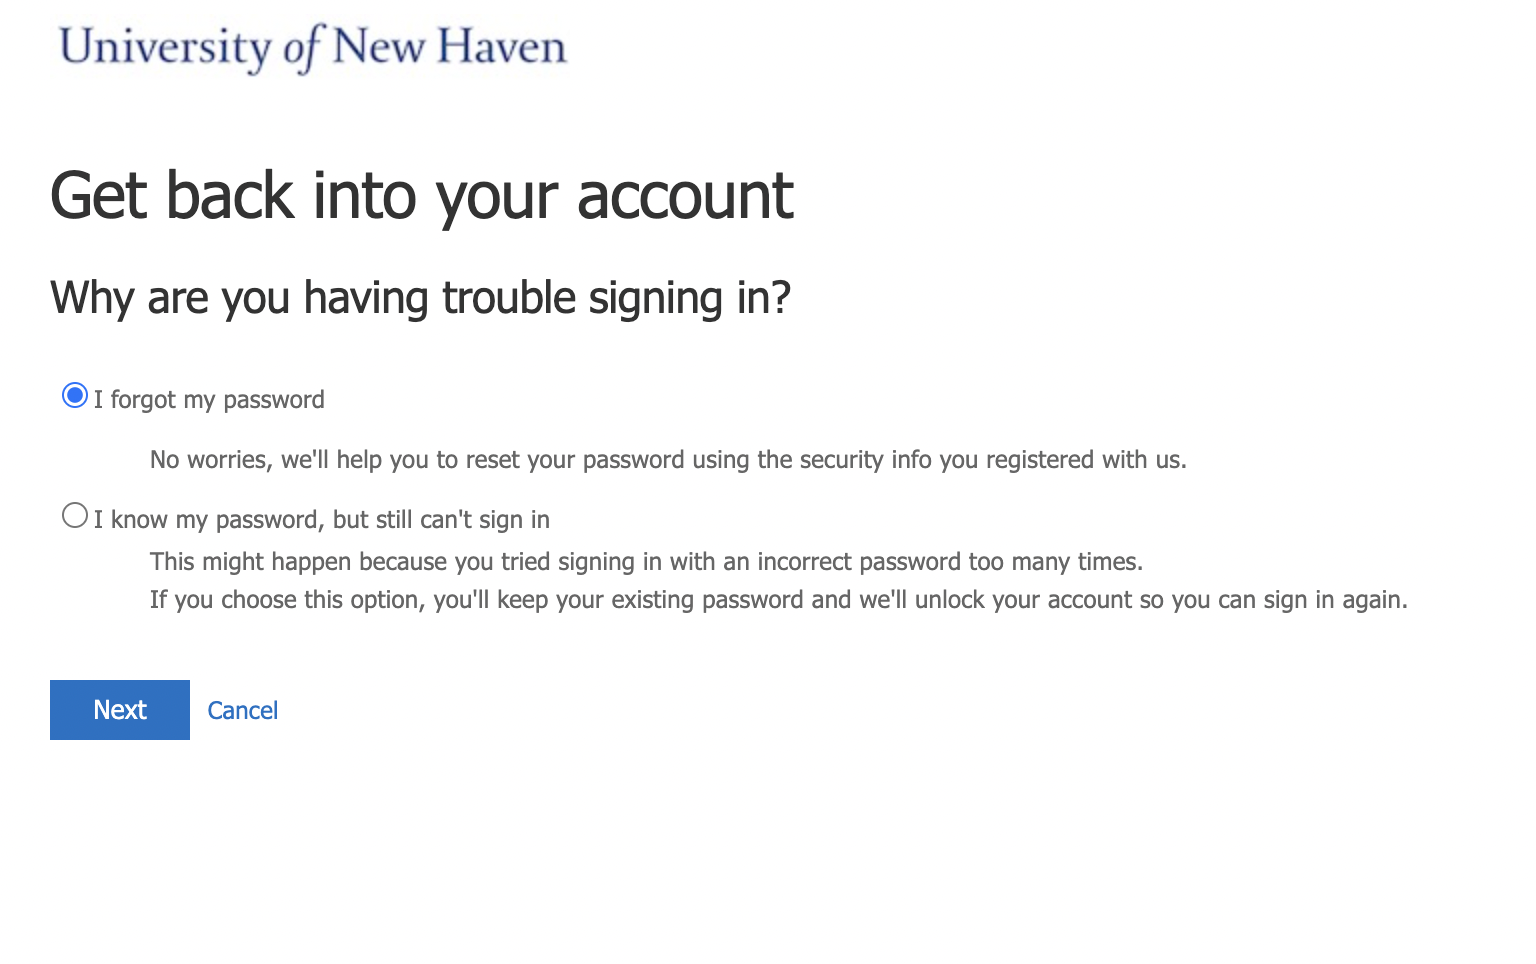
  2. Please visit https://passwordreset.microsoftonline.com/ to create your password for the first time. You must complete this step.
  3. Enter your new email address and the captcha in the image.
  4. Click “I forgot my password”
  5. Click “Email” to have a verification code sent to the same email address your student account notification email went.
  6. Receive and enter Verification Code
  7. Set your new password.
  8. Your new password has been set. You will receive a confirmation email to both your personal email account and your new student email account.
Step 2: Microsoft MFA

Microsoft Authenticator (required)

Follow the video instructions below. If you need additional help, a step-by-step written guide is also available beneath the video.
Microsoft Authenticator Setup Instructions

Step 1. Download and install the Microsoft Authenticator application

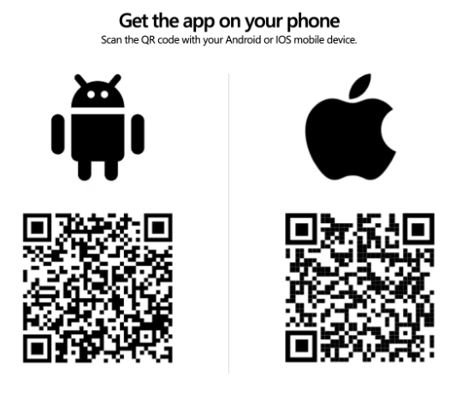
The authenticator application can be downloaded by scanning the QR code with your phone.

QR Codes for Microsoft MFA download

Download the Microsoft Authenticator application by tapping on the Apple App Store or Google Play Store below.

Step 2. Add Microsoft Authenticator to your University of New Haven account

  1. On your computer, visit the My Security portal or go to https://mysignins.microsoft.com/security-info.
  2. If prompted, login with your University of New Haven email address and password.
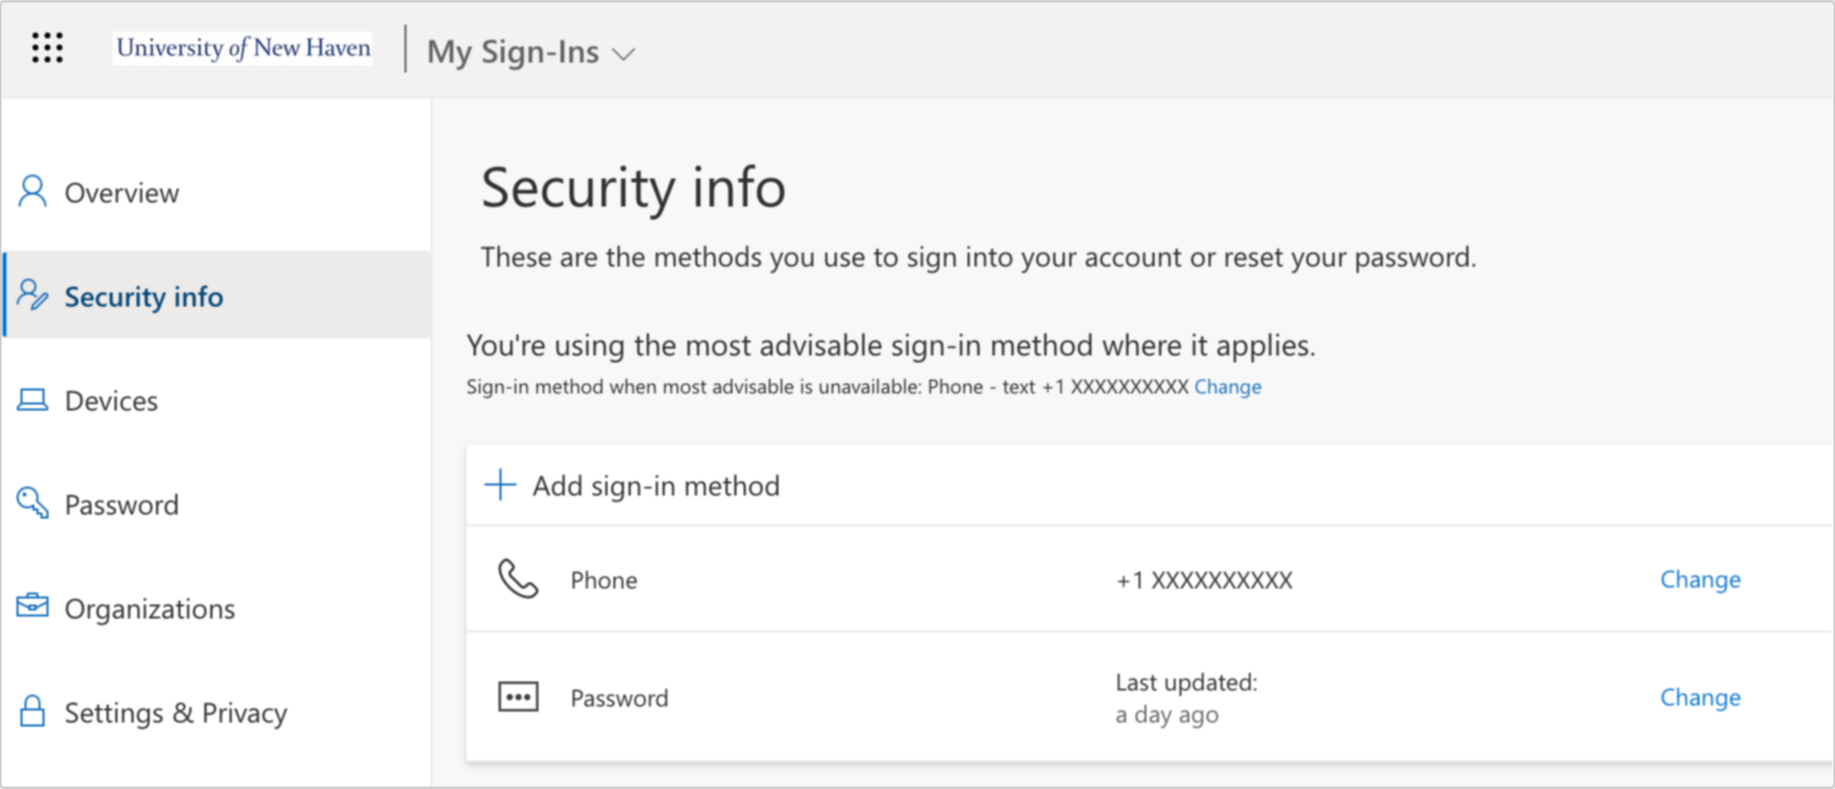
  3. Select Add sign-in methodMS Auth - Account Security Info
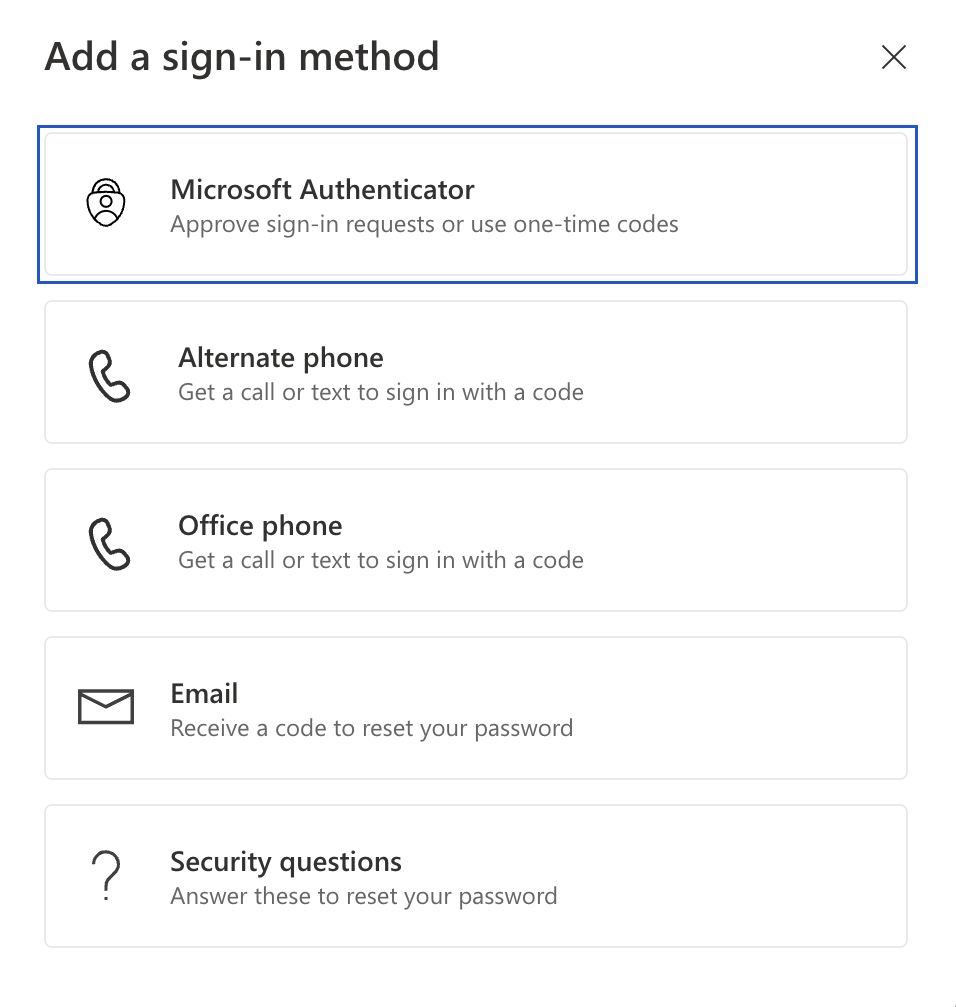
  4. Select Microsoft Authenticator from the list
    MS Auth - sign-in method
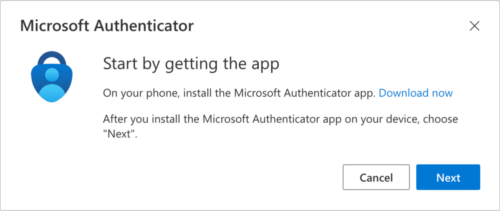
  5. On the Start by getting the app window, select Next.
    Getting the Authenticator app
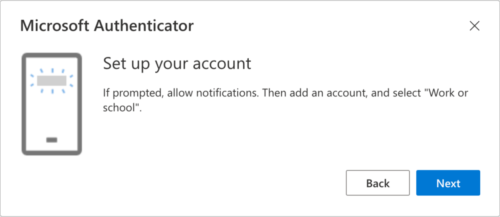
  6. On the Set up your account window, select Next.
    MS Auth set up your account
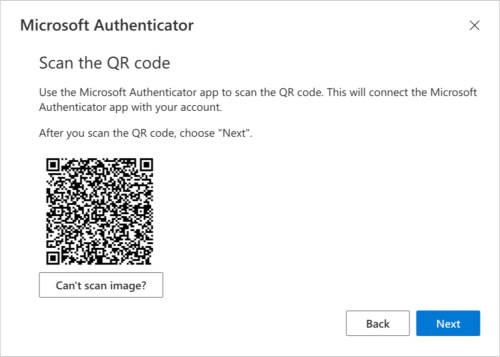
  7. The Scan the QR code page appears. Remain on this page on your desktop while you set up the Microsoft Authenticator app on your mobile device. Do not scan this QR code until step 12. Note: The QR Code presented on your computer can only be scanned by the Microsoft Authenticator application.
    MS Auth - scan the qr code
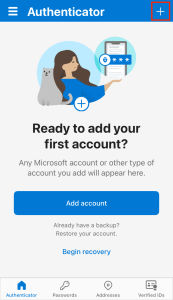
  8. Open the Microsoft Authenticator app on your iOS or Android device, select to allow notifications (if prompted).
  9. Tap on the icon on the upper-right corner.
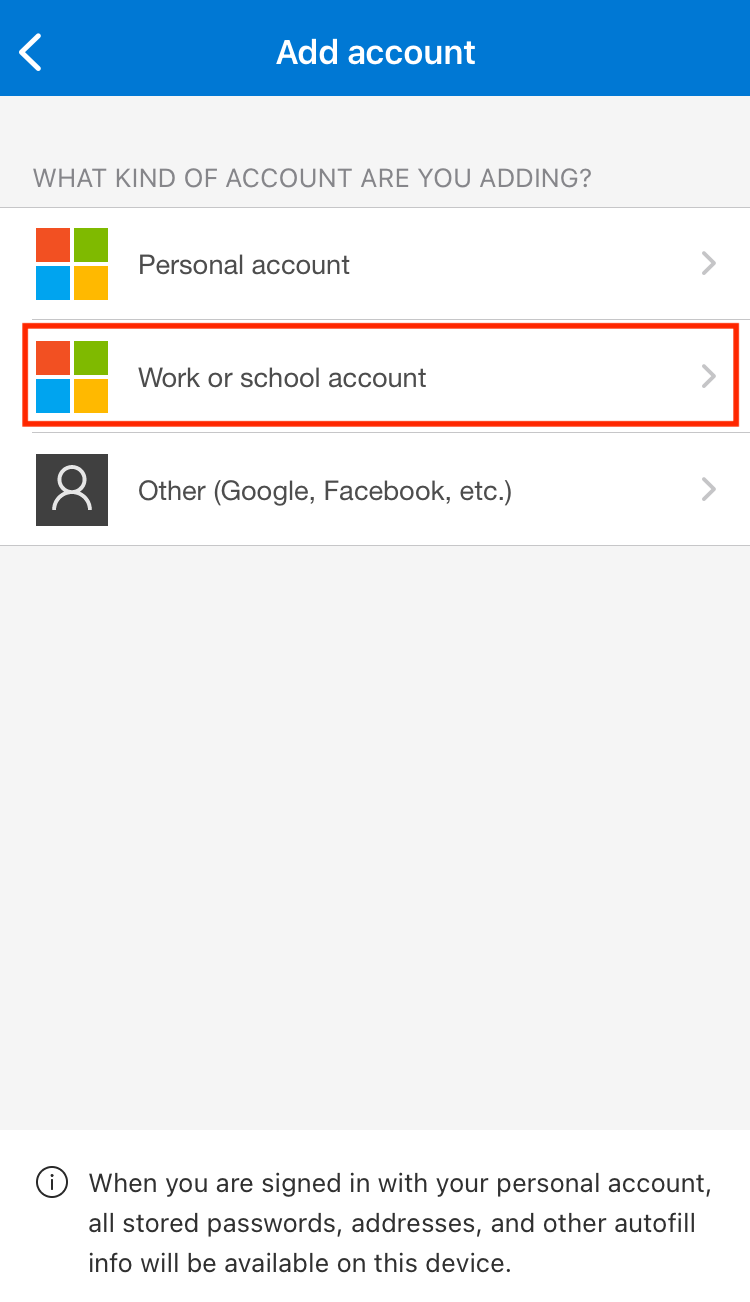
  10. A new screen will appear to add an account to the application. Tap on Work or school account.
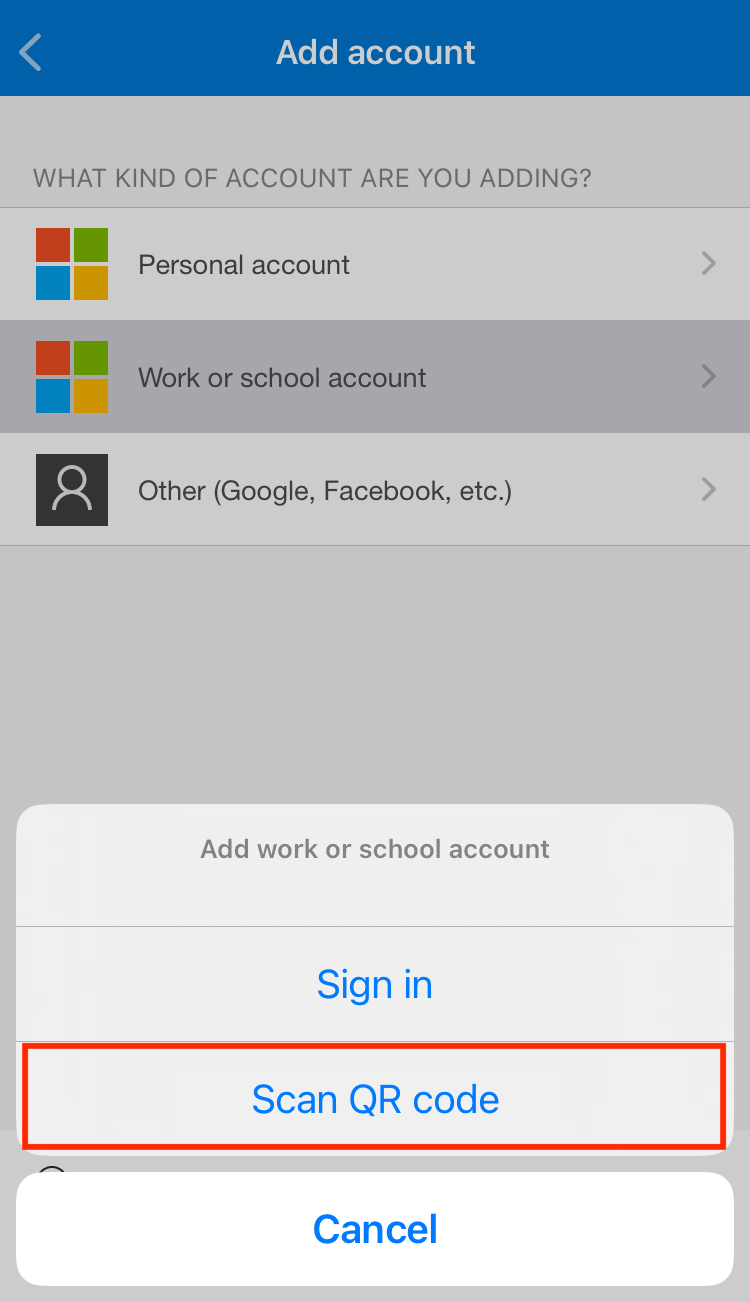
  11. On your device, select the Scan QR code option.

    Note: The first time you set up the Microsoft Authenticator app, you might receive a prompt asking whether to allow the app to access your camera (iOS) or to allow the app to take pictures and record video (Android). You must select Allow so the authenticator app can access your camera to take a picture of the QR code in the next step. If you don’t allow the camera, you can still set up the authenticator app, but you’ll need to add the code information manually.
  12. Scan the provided code on your computer with the Microsoft Authenticator app.
  13. When you see your University of New Haven account listed, please go back to your computer for further setup.  Keep your device nearby as it will be needed shortly.
  14. Select Next on the Scan the QR code page on your computer.
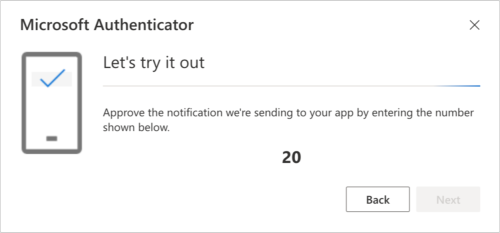
  15. Once you click Next, a number will appear on your screen and a push notification will be sent to your device to test your account.
    MS Auth - let's try it out
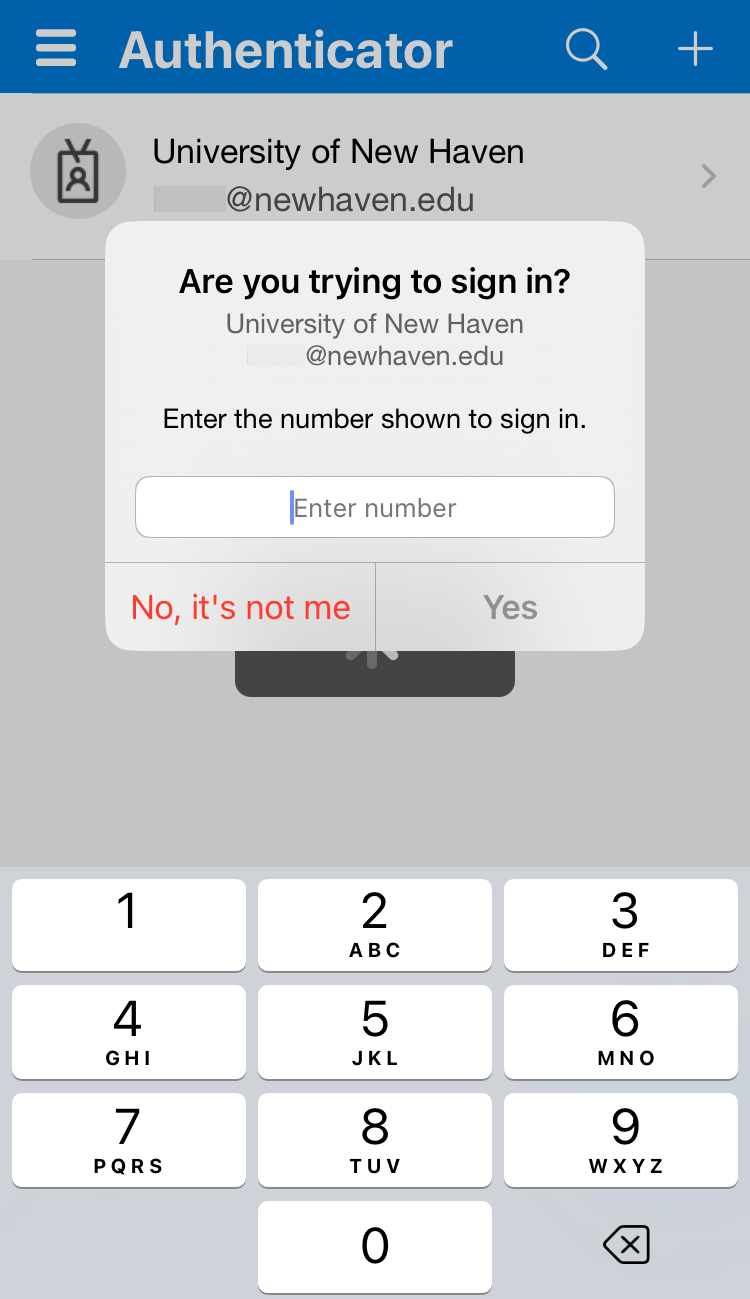
  16. Type the number shown on your computer into the Microsoft Authenticator application on your device and tap Yes.
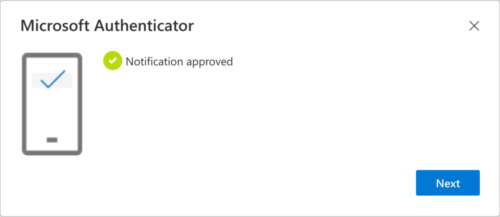
  17. After you enter the number and tap Yes, the notification has been approved. On your computer click Next
    MS Auth - notif approved

Congratulations! You are now setup with the Microsoft Authenticator app and can receive push notifications for multi-factor authentication verification and for password reset.

Step 3: Outlook for Mobile Devices

Step three: Setting up Outlook on your mobile device

Please click here for help setting up Microsoft Office 365.

Below are instructions on how to download outlook to your mobile device. 

Please note: Outlook is the University of New Haven’s only supported email client and we highly recommend using it for the best experience.

Apple

1. Click the apple icon above to be taken to the App Store to download Microsoft Outlook.
2. Open the “Microsoft Outlook” application
3. Enter your student email address and password
4. Verify with Multifactor Authentication
5. Click “Save”
6. You’ve added your account

Android

1. Click the android icon above to be taken to the App Store to download Microsoft Outlook.
2. Open the “Microsoft Outlook” application
3. Enter your student email address and password
4. Verify with Multifactor Authentication
5. Click “Save”
6. You’ve added your account

Known Issues and Fixes

Please visit our page here to learn more about known issues and fixes that are implemented. 

The owner of this website has made a commitment to accessibility and inclusion, please report any problems that you encounter using the contact form on this website. This site uses the WP ADA Compliance Check plugin to enhance accessibility.