Getting connected to Ethernet
Due to the type of device, you are using or your needs you may want to connect your device via an Ethernet cable. Most of our campus living spaces have Ethernet access for students to utilize on their devices.
What are my options?
- Access to Ethernet through Xfinity Modem
- (Wall ports cannot be activated)
- Wall Jacks
- Access Points
- Wall Jacks
- Access Point Switch
- Wall Jacks
- Access Point Switch (May not be available in every room)
- Wall Jacks
- Wall Jacks (some rooms may not have ethernet, ethernet cannot be added in these rooms)
- Access Point Switch (First floor only)
- Wall Jacks
- Access Point Switch
- No Ethernet Available
- Wall Jacks
- Access Point Switch
- Access Point Switch (First floor only)
- No Ethernet Available
- Access Point Switch (First floor only)
- Wall Jacks
- Access Point Switch
- Access Point Switch
- (Only one access point per unit, access points cannot be moved or relocated)
- Wall Jacks
- Access Point Switch
- No Ethernet Available
- Wall Jacks
- Access Point Switch
Step One:
Find out if your device is supported on our network. If you do not see your device listed, please email us at studenttechsupport@newhaven.edu. We will be happy to test your device and add it to our list.
Additionally, if you have connected a device we do not have listed, please let us know so we can add it to our list.
- Game Consoles
- Other Devices
- Smart TVs
- Streaming Devices
Step Two:
Find your device’s MAC address. If you are unsure of where to find your MAC address, please use the table below.
- Game Consoles
- Smart TVs
- Streaming Devices
- Computers
- Open the Oculus companion app on your phone
- Find “Settings”
- Select the drop down menu for Quest
- Choose “More Settings”
- Select “About this Headset”
Nintendo Wii
On the bottom left-hand side of the home screen select the “Wii” button
Click “Wii Settings”
Click “Internet”
Select “Console Information”
Your MAC address will be displayed on the screen
Nintendo Switch
- Select System Settings from the HOME Menu.
- Scroll down through the menu and select Internet.
- The Nintendo Switch console’s Wired MAC address will be listed under System MAC Address.
Nintendo Wii U
From the Wii U Menu, select “System Settings”
Use the left stick to select “Internet” and press the “A” button
Select “View MAC address” and wait for it to display
Sony Playstation 3
From the PS3 main menu, select “Settings”
Select “System Settings”
Select “System Information”
Your Wired MAC address will be displayed on the screen
Sony Playstation 4
Select “System”
Select “System Information”
Your Wired MAC address will be displayed on the screen
Xbox 360
Click “System” app
Select “Network Settings”
Select the network you wish to find the MAC address for
Select “Configure Network”
Select the “Additional Settings” on the upper right-hand side
Select “Advanced Settings”
Your MAC address will be displayed on the screen
Xbox One
Press the “Menu” button on your controller
Find the “Settings” page
Select “Network”
Click on “Advanced Settings”
Your MAC address will be displayed on the screen labelled “Wireless MAC”
Samsung
Go to your TV’s menu and choose “Network” > “Network Settings”
Chose “Wired” for your connection type
On some smart TV’s, you will see the MAC address on the next screen
If it is not displayed, go back to the “Menu” and choose “Network” > “Network Status”
Sony
Press the “Home Button”
Scroll to “Settings”, then press enter
Scroll to “Network Setup/Settings”, press enter
From the menu, select “Wired or Ethernet Setup”, press enter
Click on “Network Setup” > “Status”
The MAC address should display on the screen
Vizio
Press the “Menu” button on the remote
Select “Network”, then press “OK”
Select “Manual Setup”, the press “OK”
The MAC address should display on the screen
LG
From the Setup menu, select “Connection Setting” and press enter
Select “Wired” and press enter
Select “Yes” and press enter – the new connection settings have been set
Select the “IP mode Dynamic”
Select “Dynamic” to allocate an IP address automatically
To see connection status, select “Test” and press enter
Select “OK”, and press enter to apply settings
The player will prompt you to test the network connection, select “OK” and press enter
Apple TV 4th Generation
On the main menu, click “Settings”
Select “Network” and click to proceed
At the bottom of the page, you will see your MAC address listed as “Ethernet address”
Apple TV Older Models
On the main menu go to “Settings”
Select “About”
Your MAC address is listed as “Ethernet ID” or “Ethernet MAC”
Alternatively, there is a sticker on the bottom of your device listing the wired MAC address, or ethernet MAC address
- Go to the Roku Home screen
- Select Settings and press the OK button.
- Select System and press the OK button.
- Select About and press the OK button.
- The wired MAC address is listed next to Ethernet MAC Address.
Go to the “Settings” menu
Select “System”
Select “About”
You MAC address should be listed
OR
During initial setup, choose country/region
On the connect to network page, scroll all the way to the right and the MAC address will be listed last
- Go to System Preferences
- Click on Network
- Click on Ethernet on the left tab
- Click on Advanced
- Click on Hardware
- Your MAC address will be listed as MAC address
Option 1
- Go to Search
- Type in Settings
- Choose Network & Internet
- Click on Ethernet or Wired
- Click on Hardware Properties
- Your MAC address will be listed as Physical address (MAC) or Wired MAC Address
Option 2
- Click the Windows Start Menu in the bottom left
- Type in CMD
- Once Command Prompt is open, type in the following command
- ipconfig/all
- Under Ethernet adapter Ethernet
- The Physical Address (MAC) will be listed
Step Three:
Once you have your MAC address, here is where you will register your device to be able to connect to the ethernet. Please click “Register My Device Now” to get started. After you finish the registration, please return back to this page and follow step 4.
Step Four:
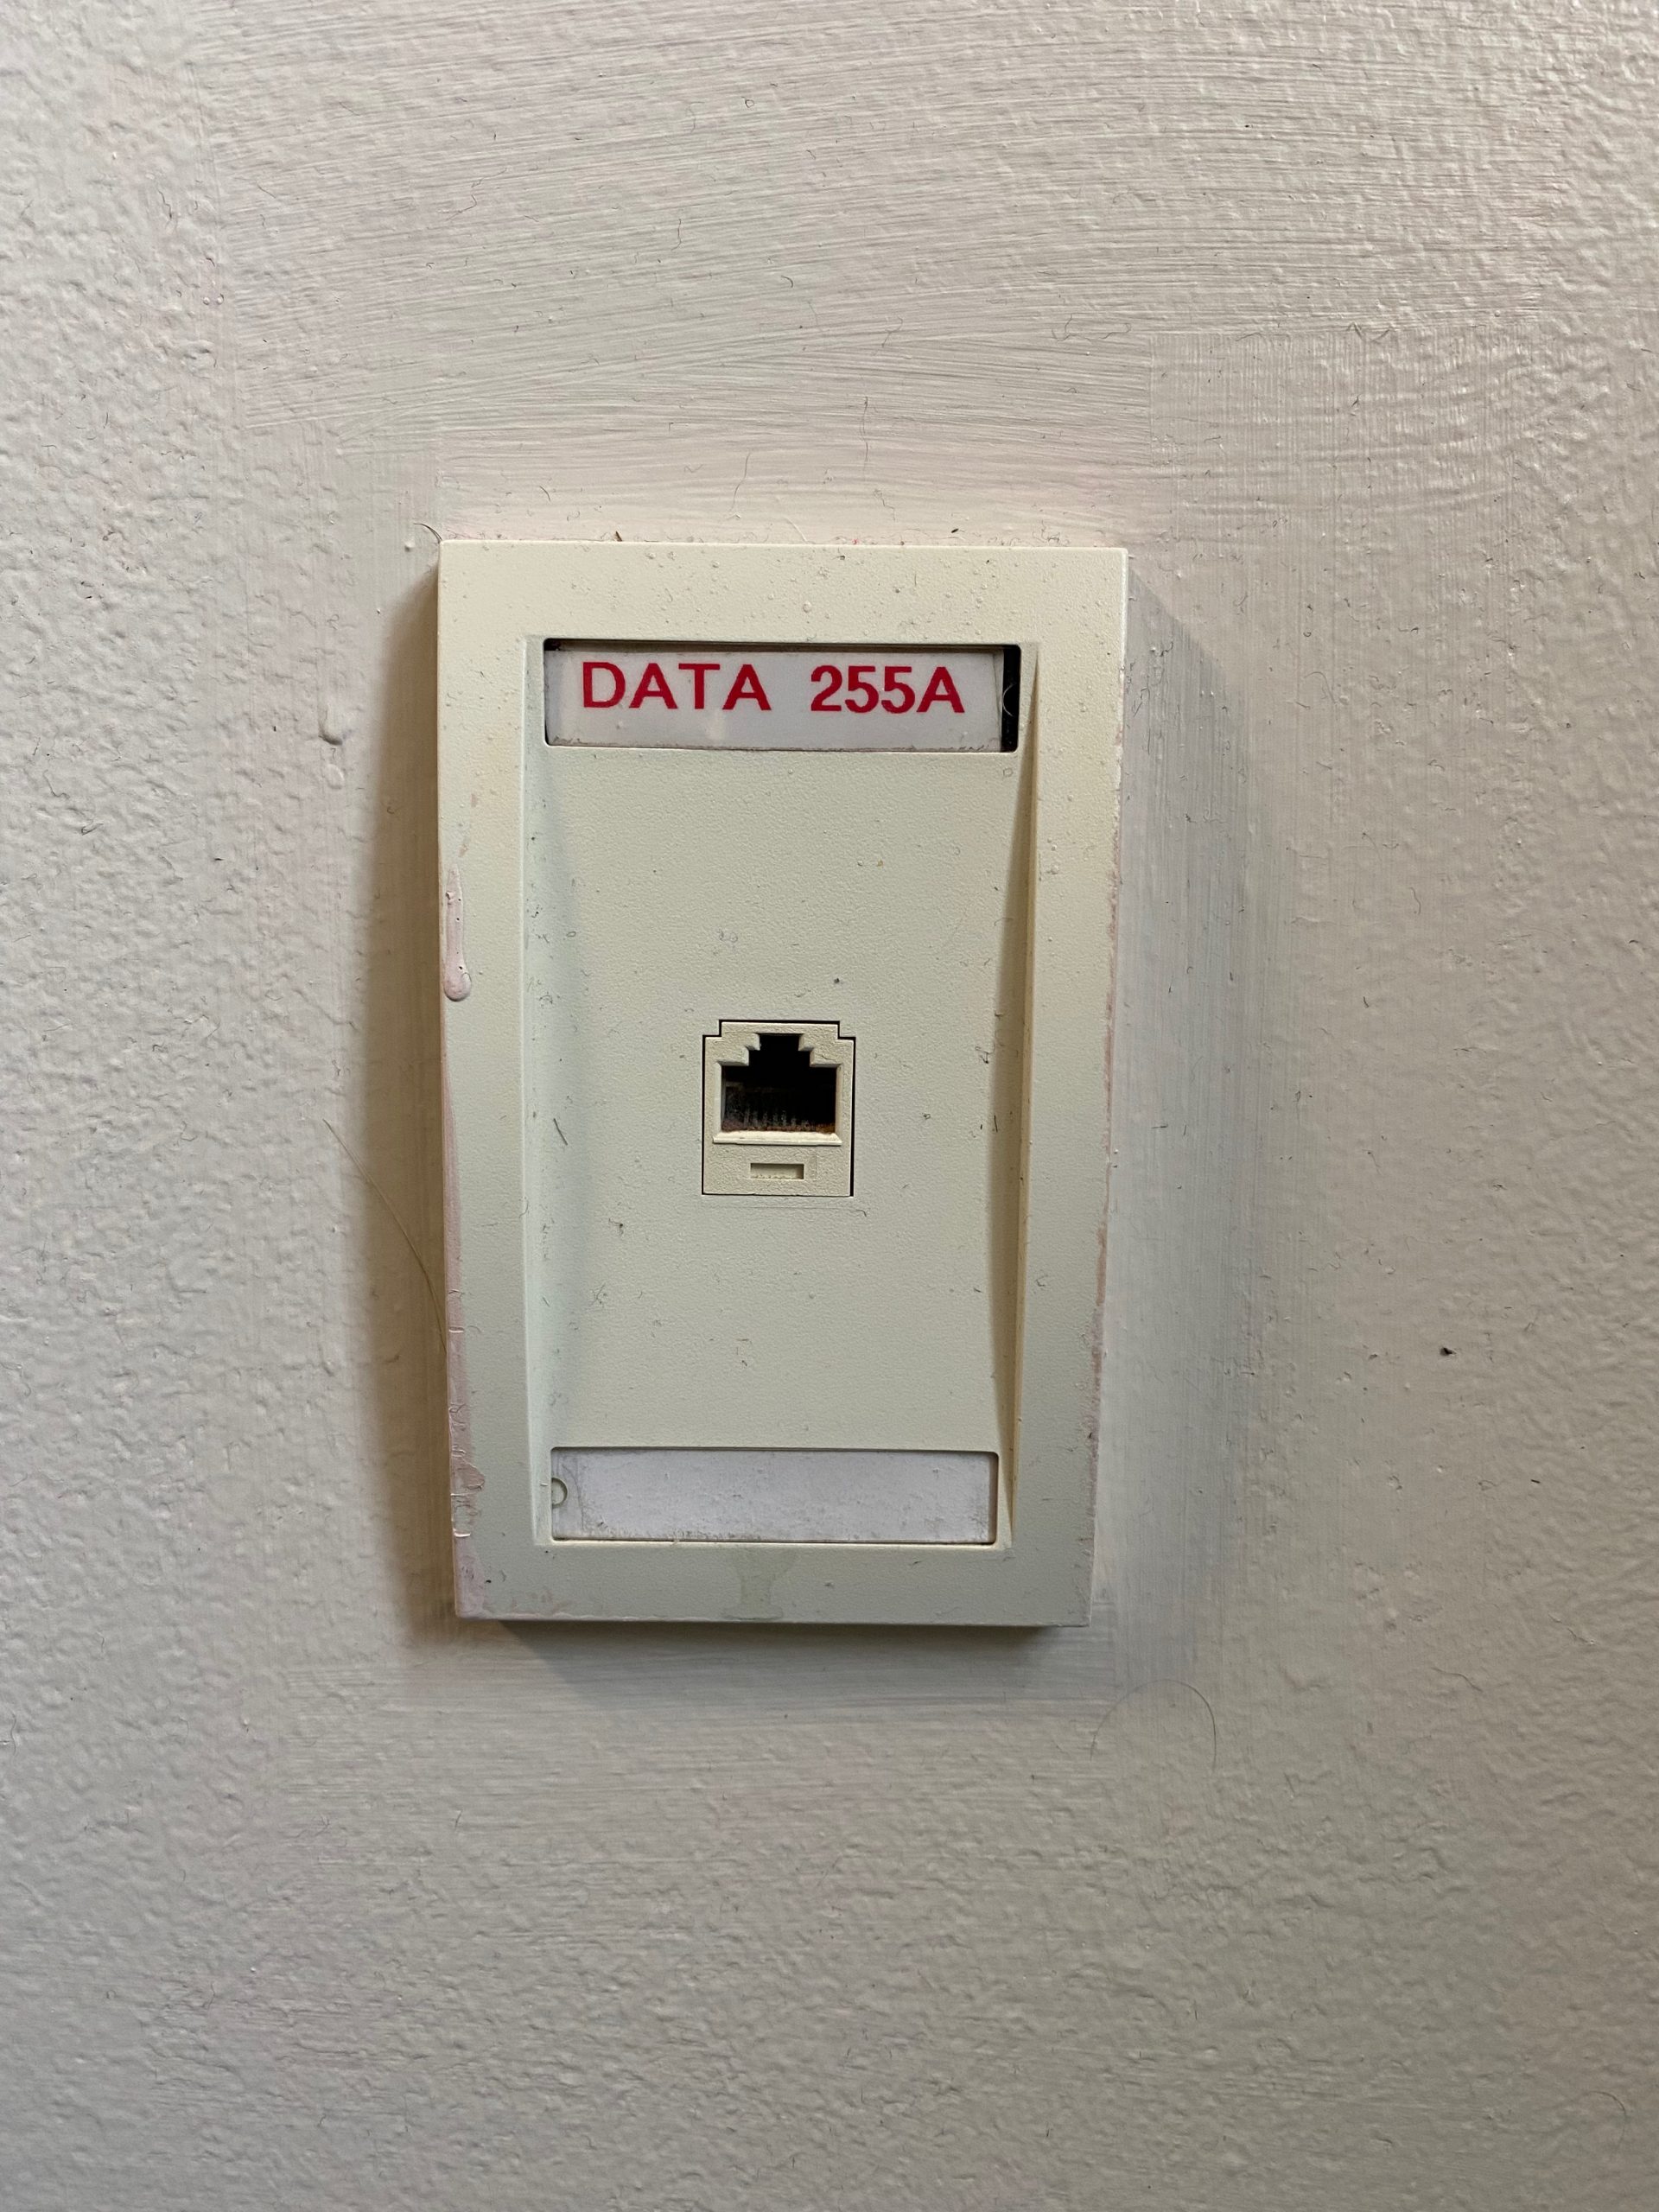
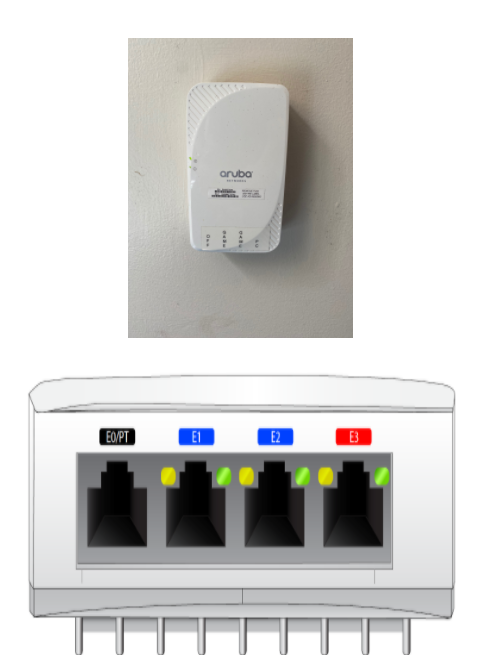
Please follow the instructions under the picture that looks like your ethernet port.

Wall Jacks
Wall jacks will need to be activated manually by the Office of Information Technology staff. You can request to have your wall jack activated by clicking on the button below and submitting the online form.

Access Points
Access point switch ports are already activated. Once you have registered your device, you can then plug your device into E1, E2 or E3 port. * Note E0 port cannot be used.
Troubleshooting
- Please unplug your device from the access point, and then plug it back in after 3 minutes.
- Due to the building design of Westside, Parkview, and Forest Hills, there are no ethernet ports available to use. We apologize for the inconvenience. If you are having wireless network issues, please contact studenttechsupport@newhaven.edu.
Additional Support
Students
StudentTechSupport@newhaven.edu
Phone: 203-932-TECH (Option 3)
Office: Location in Maxcy 109
